Automated and Evergreen Webinars: What They Are and How to Set One Up
An automated webinar is a recorded presentation that plays in a webinar room by itself. People register, enter the room and watch, and things happen at set seconds of the video: a chat message, a poll, a button with your course offer. Nobody has to be online to host it. It plays either on demand, starting when each viewer clicks, or on a schedule, where everyone who comes watches the same session.
An evergreen webinar is the content side of the same idea: a presentation that stays true for months. It has no dates and no "this Friday only", so it can run for a year without a re-recording. A course webinar usually needs both.
We'll use one example from planning to setup. Say you teach home bike repair and sell Fix Your Own Bike, a $129 video course. The free webinar is "Five repairs you can do at home this weekend", recorded once, 50 minutes long.
What an automated webinar is made of
- The recording, filmed as a real class, not as a sales pitch with a lesson attached.
- A registration page that asks for an email and gives each person their own link to the room. The personal link is how the software knows who came and how long they stayed.
- A timeline: events tied to seconds of the video, such as a poll at minute 5 and the offer at minute 38.
- Two or three follow-up emails. Some people register and never press play; these emails are for them as much as for the viewers.
A YouTube video with a link in the description gets views, but not the email first, the offer at a moment you chose, or a list of who stayed to minute 38.
On demand or on a schedule
On demand means no sessions. A person registers, enters the room and starts the video from the beginning, today at lunch or next Sunday. The timeline starts with their click, so the offer appears at minute 38 of their own viewing.
On a schedule, you set slots, say Tuesdays at 7 p.m. and Saturdays at 11 a.m. Everyone in a slot watches one shared session. Early arrivals wait for the start. Late arrivals, in tools that work like Scholaxy, join the video at the current moment. Here is the Tuesday session for four people:
| Arrives | Lands at | The offer |
|---|---|---|
| 6:55 p.m. | Waiting screen until 7:00 | Appears at 7:38, after the whole class |
| 7:20 p.m. | Minute 20, the flat tire already fixed | Appears 18 minutes after they arrive |
| 7:41 p.m. | Minute 41 | In the middle of it, without the 38 minutes that explain it |
| 7:55 p.m. | The session has ended | Waits for Saturday at 11:00 |
A schedule gives you a shared session and a time to commit to. It costs you reminders for every slot, the late arrivals in that table, and a wait of days for anyone who misses a slot.
We'd start on demand. Right after registering, a person is as interested as they will ever be, and on demand lets them watch now. Move to a schedule once you have tested reminder emails for each slot and someone who can watch the chat during sessions.
Should you present an automated webinar as live?
Many automated webinars pretend to be live, with a red "live" badge and chat messages from viewers who don't exist. We recommend against it. Both sides:
What "live" framing buys: a reason to turn up at a set time, and the feeling that a question will get an answer. We know of no trustworthy numbers on how much it adds.
What it costs. People find out: someone registers twice, or a friend watched last week, and hears the same "spontaneous" joke at minute 12. After that, they don't believe the offer either. Real questions go unanswered while the "live" host carries on. And the people who feel tricked are the ones who ask for refunds, after paying.
What we'd do instead: say what it is in one line on the registration page and in the first minute of the video. "This is a recorded class. The chat is open, and I answer every question by email within a day." That keeps the useful part of live, an answer from a person. If the recording comes from a real live session, say so. Scripted chat messages are fine for things you'd say anyway ("questions go here, I answer by email"), signed with your name, not a made-up viewer's.
Plan the evergreen webinar minute by minute
The shape that works for a recorded class with an offer: a short intro, teaching for most of the time, the offer, questions. Here is the bike webinar; change the length, the offer minute and the price to your own.
Example: 50 minutes, on demand, offer at minute 38, a $129 course, replay open for 72 hours. That is 33 minutes of teaching in 3 blocks, the offer for 5 minutes, then 7 minutes of Q&A.
| Minutes | Part | In the bike webinar |
|---|---|---|
| 0–5 | Intro | Who it's for and what they'll fix by the end. Poll at second 300. |
| 5–16 | Teaching block 1 | The most common mistake: a new tube that goes flat again. |
| 16–27 | Teaching block 2 | A worked example: brake pads, start to finish. |
| 27–38 | Teaching block 3 | Chain cleaning, saddle height, then gear adjustment, the step that's hard alone. |
| 38–43 | Offer | What Fix Your Own Bike adds, $129, one link. |
| 43–50 | Q&A | Answers to questions real viewers asked. |
Follow-up emails: D+0, the offer at $129 and a link back to the video. D+1, answers to 3–5 common questions. D+3, last call before the replay closes at hour 72.
Prepare: the full video checked on phone speakers, an offer slide with the price, a test purchase from a phone, a reply address for questions, a registration page with a "Watch now" button, a thank-you page that leads to the video.
Teach for real. Someone who fixes their own flat on Saturday believes you about the other twenty repairs; someone who heard "the rest is in the course" five times doesn't.
Make the offer once, at a planned second. You talk about the course for five minutes, but the button stays on screen from second 2280 (38 × 60) to the end, 720 seconds, so people can click during the Q&A. For the Q&A itself, use questions people really asked, from a live run or from your inbox.
Deadlines. The planner assumes the replay closes at hour 72. Write "last call" only if it really closes. A countdown that hits zero at the end of the video while the course is still on sale the next morning is the same problem: a fake deadline that returning viewers see through. If nothing closes, leave the timer off and make D+3 a plain answer email.
What goes into each follow-up email is covered in webinar follow-up emails. One limit: many tools can't split follow-ups by who watched, so write the D+1 email to work for both.
Where it goes wrong
An automated webinar is the wrong tool for a cohort with a fixed start date (a dated launch with one live session sells it better), for a $2,000 coaching program (end with a call booking, not a checkout), and for topics that date fast, like app screens or this year's rules. With 20 registrations a month, a month of data tells you almost nothing.
The setup mistakes we'd check first:
- The video link is a normal watch page instead of an embed link, and viewers see an error.
- The offer button leads to a page with a different price from the one in the video.
- Nobody tested it as a viewer, from registration to the click at minute 38.
- The recording says "tonight" or a year, and every viewer after the first week hears it.
What automated webinar software has to do
When you compare automated webinar software, ask:
- Does it play a recording on demand and on a schedule, and what happens to a late viewer?
- Can you tie a chat message, a poll and an offer button to seconds of the video?
- Does each registrant get a personal link, so watching time is counted per person?
- Does the button lead to a real checkout, or create an order your team can follow up?
- Does it show retention by minute and clicks on the button?
- Do follow-up emails stop when someone buys?
- Do reminders work for repeating slots, or only for a webinar with one date? Test this before you promise anyone a reminder.
For the whole path from the ad to the sale, see the webinar funnel article.
How to set it up in Scholaxy
Webinars live under "Website" → "Webinars". An "Automated webinar" there is a recording, a scenario (the timeline of events) and, optionally, a schedule.
First set up the sale: a course product and a $129 offer in "SmartCRM" → "Products", placed on a course page in a "Pricing" block. The offer button will lead there.
Step 1. The webinar.
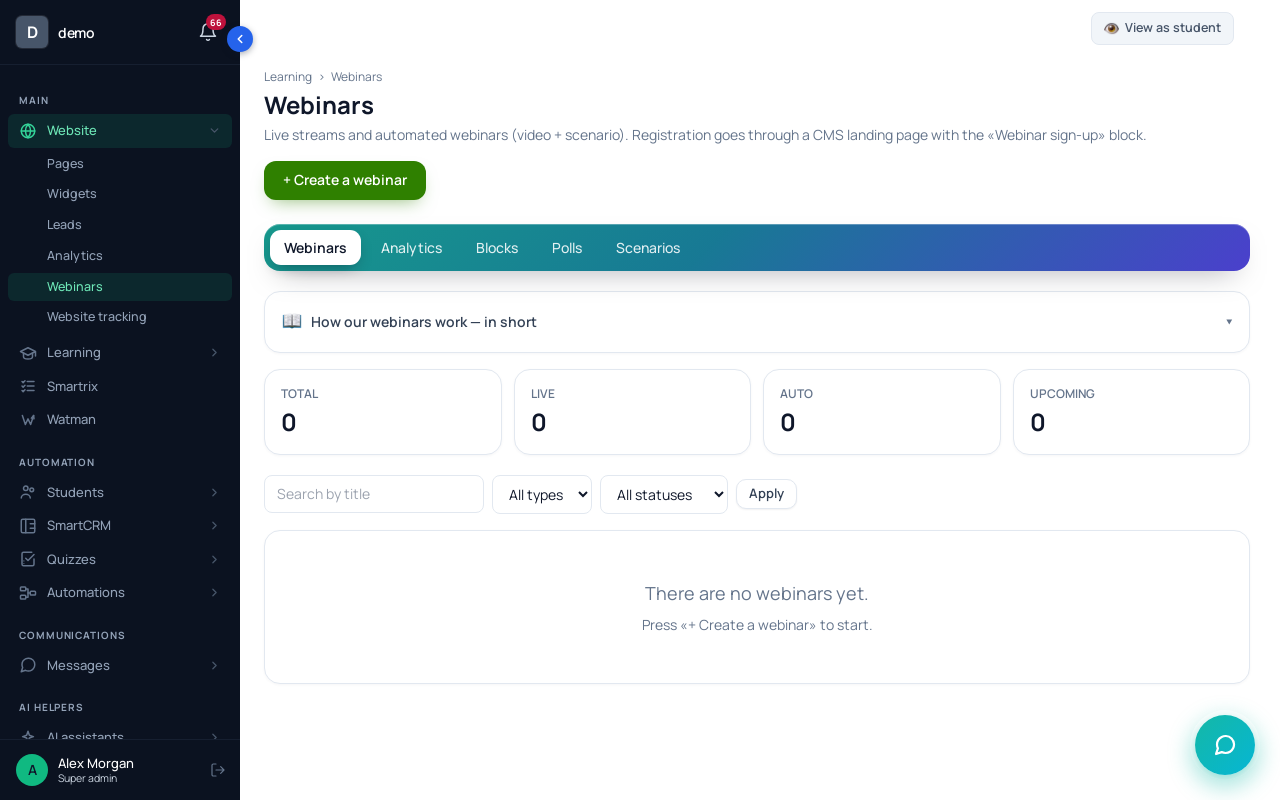
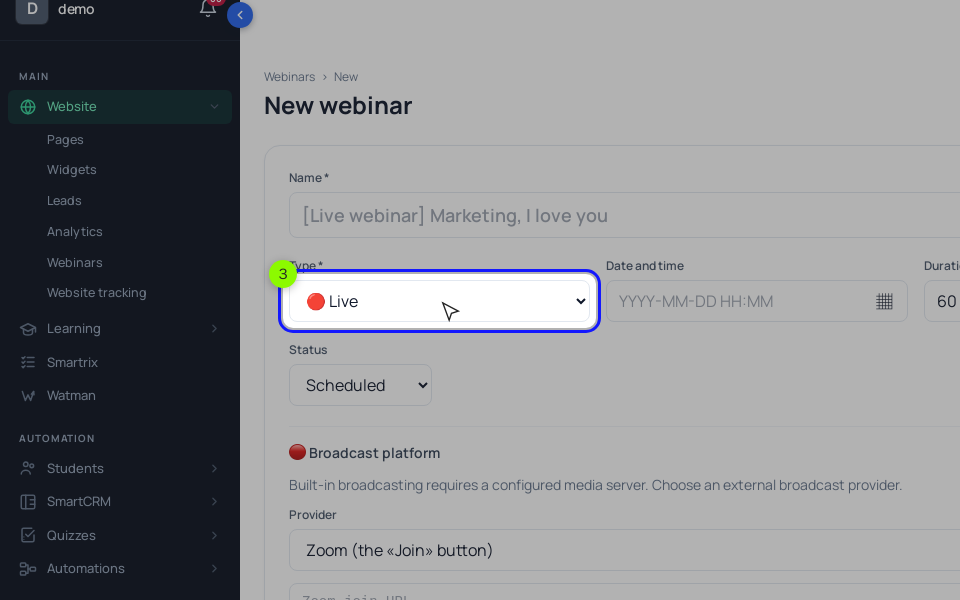
Click "+ Create a webinar" and set "Type *" to "Automated webinar". Set "Duration (min)" to 50, the length of the recording: "Watched to the end ≥80%" in analytics counts from it. For on demand, leave "Date and time" empty. Paste the recording in "Recording URL (YouTube)" as an embed link, https://www.youtube.com/embed/…; a youtube.com/watch… link shows an error. Uploading a file on the "📹 Recording" tab works only if your school has file storage connected.
With no slots, the room is always open, and each viewer starts the video from the beginning after "▶ Join the broadcast". For sessions, open the card's "⚙️ Settings" tab, find "The automated webinar schedule", choose "Every week" or "One-off (a date)" and click "Add a slot". Times are in your school's time zone; a daily session takes seven weekly slots.
Step 2. The scenario.
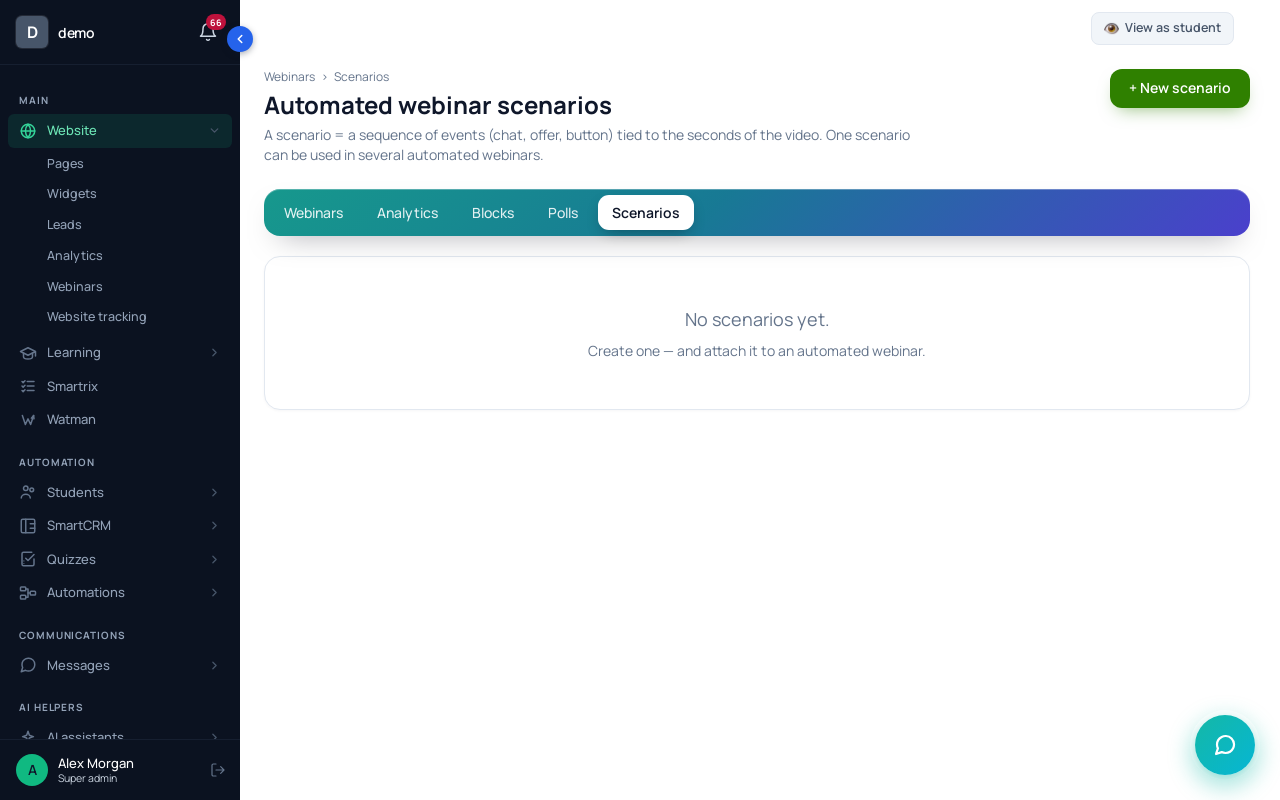
Click "+ New scenario", name it, click "Create" and add events with "Moment (sec) *" and a type. For the bike webinar: a "Poll" at 300; "An offer with a CTA" at 2280, with the course page URL and "How many seconds to show it" set to 720; "A message in the chat" at 2340 saying where questions go. Chat events take any author name, and viewers see scripted and real messages as one chat, so turn on "A comment from a staff member" and sign them as yourself. Check the timing in "Scenario preview", then pick the scenario in the webinar card. A recording of a live Scholaxy webinar can bring its chat along with "Carry over the chat of a past live webinar"; tell viewers where those messages come from.
Step 3. The offer button.
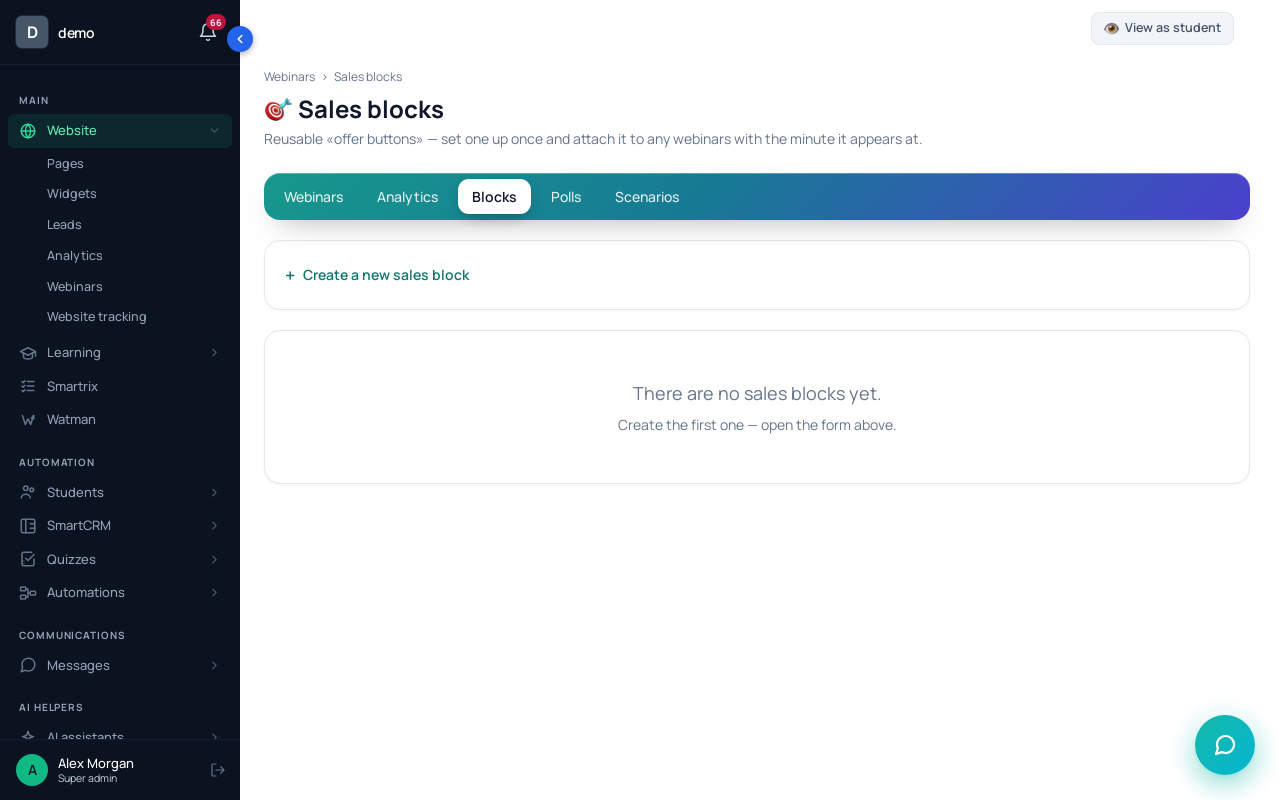
"An offer with a CTA" is a link to the course page, where "Pricing" takes the viewer to payment. To call people first instead, create a sales block on "Blocks" with "Show a form → collect the data + the offer" and the $129 offer, and attach it on the card's "🎯 Blocks and polls" tab at 2280 (the field takes seconds). Each request becomes an order with the "New" status in "SmartCRM" → "Orders": a request, not a payment. We'd leave "Countdown timer (sec)" at 0.
Step 4. Registration and follow-ups. Add a "Webinar signup" block to a page, enter "The webinar ID *", publish, and choose the page in the card's "Sign-up landing page". The signup card shows an "Automated webinar" badge to visitors, one more reason not to call it live. A new registrant sees "Enter the room →" at once, and the webinar appears in their "My webinars". No email goes out at that moment, and an on-demand room has no closing time: unless you take it down yourself, write D+3 without a deadline.
The built-in reminders ("Send the system emails about the webinar") are timed from "Date and time", so a webinar without a date gets none, and schedule slots get none either. The D+0 email is yours. In the block's "Actions after submitting", choose a process in "Start a process". In that process, set "The launch trigger" to "Disabled" and click "▶ Activate", which also approves it; the field marks processes that won't start. The process's "Send an email" steps can include {webinar_link}, the person's own room link. Give the process a stop condition for buyers; the automated sales funnel guide shows that setup. As written here, the follow-ups reach every registrant. Segments have a "Webinar attendee" condition, but test it with two addresses (one that watches, one that doesn't) before you split emails by it.
Step 5. Test and read the numbers.
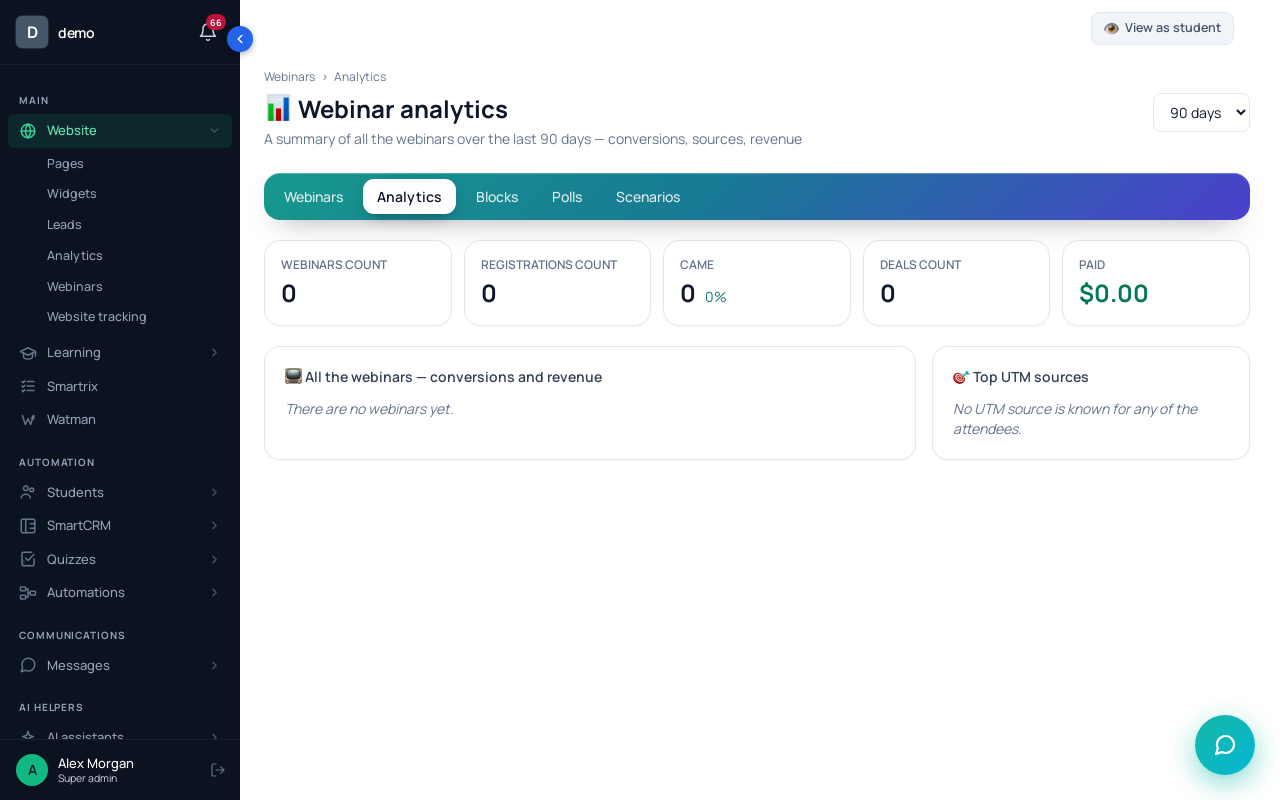
"👁 Preview the room" shows the viewer's side without counting in analytics. Then register with a second email and watch to minute 39 for real. After a week, the webinar's "📊 Analytics" shows the minute where people leave (the viewer retention chart) and "Clicks on the CTA buttons".
Can I turn a past live webinar into an automated one?
Yes, if the recording holds up without its dates. In Scholaxy, "⎘ Copy" on the live webinar's card makes a new webinar with no date or landing page; switch it to "Automated webinar" and add the recording. Say on the page that it was recorded live.
Do I need to watch the chat?
Someone has to read it and answer when you said you would. Viewers' messages land on the card's "💬 Chat" tab.
Setup order and the first two weeks
- Plan: length, offer minute, three follow-up emails.
- Record the class with no dates in it; copy the YouTube embed link.
- Product, $129 offer, course page with "Pricing"; buy once with a test payment.
- Create the automated webinar: type, duration, recording, no date for on demand.
- Scenario: poll at 300, offer at 2280 for 720 seconds, staff message at 2340.
- Registration page with "Webinar signup", linked in "Sign-up landing page".
- Process with D+0, D+1, D+3 and a stop condition for buyers.
- Register with a second email and click the offer at minute 38.
- After a week, read retention and clicks; change one thing, then wait another week.